


Surgery steps
This page will outline the 5 steps involved in performing the surgery for hiatus hernia repair. Please rest assured that we will not display any real-life images from surgery. The individual steps are illustrated using drawings and explained in clear, easy‑to‑understand text.
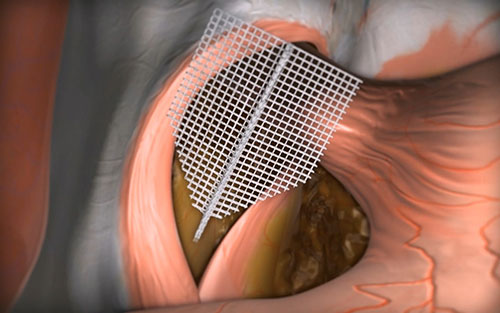
The first step involves using a laparoscope to locate the hernia orifice in the region where the oesophagus passes through the diaphragm. The oesophagus is then mobilised by extensive dissection in the thoracic region (chest) and repositioned into its anatomically correct position. At this point the mesh implant is adjusted to precisely fit the size of the hernia orifice.
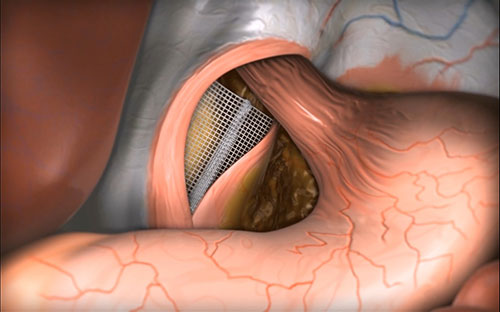
The mesh is then inserted, with the nose-piece first, between the crura at the oesophageal hiatus. The two flaps are positioned immediately adjacent to the oesophagus. The mesh implant now completely closes off this cleft, leaving just the natural anatomical space where the oesophagus passes through the diaphragm.
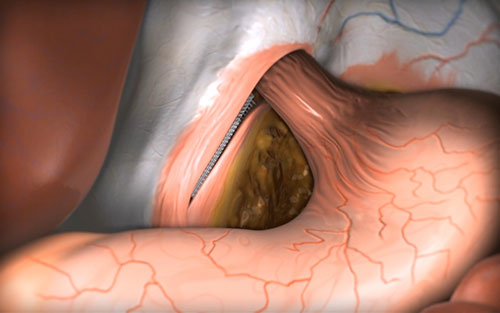
The next step involves approximating the inner and outer limbs of the diaphragmatic cleft so that the tissue is completely overlying the two flaps of the mesh. Now only the central bridging section can be seen.
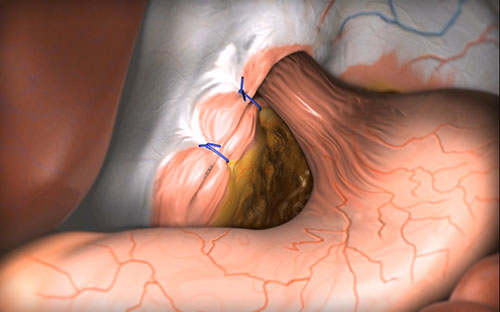
At least two stitches are then placed through the two limbs of the diaphragm and around the underlying central bridging part of the mesh to fix everything in place.
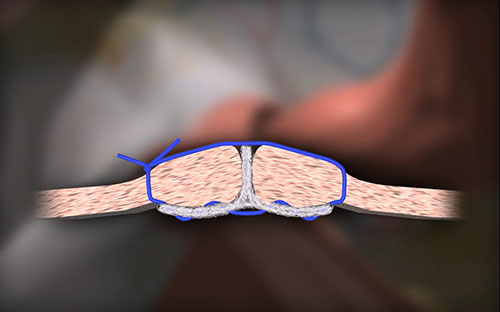
The special shape and structure of the mesh implant with its two wings and a fixed nose-piece placed between the two crura of the diaphragm ensure a stable closure of the hernial orifice.
Animation
Click here to see an animation demonstrating the individual steps of the surgery in a short video.